
# The Ultimate Beginner’s Guide to Weapons and Armor in MHFU Monster Hunter Freedom Unite.
Geminvo – You’ve heard the legends. The infamous “Claw” grip on the PSP. The hip-check hitboxes that seem to defy physics. The sheer, unadulterated challenge of a game that respects you so little it won’t even tell you a monster’s health. And you’re here anyway. Good. That’s the first sign of a true hunter.
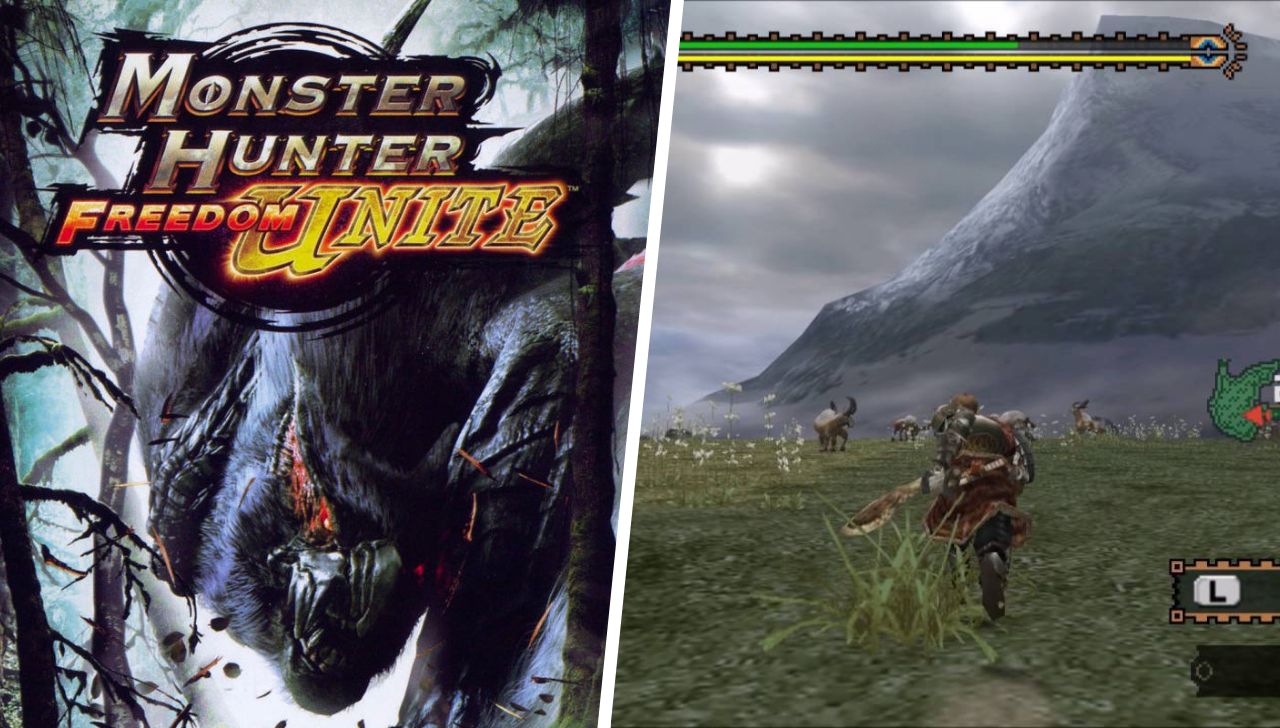
Welcome to Monster Hunter Freedom Unite, the quintessential old-school Monster Hunter experience. This isn’t just a game; it’s a rite of passage. It’s a title from an era before quality-of-life features were standard, where the game manual was your best friend, and every victory felt truly, deeply earned. You’re about to step into a world that is as brutally indifferent as it is breathtakingly rewarding.
But you’re not alone. Think of this guide as the seasoned veteran from Pokke Village, the one who’s seen it all, carted more times than they can count, and lived to tell the tale. I’m here to be the mentor you wish you had, to translate the arcane knowledge of the “Old World” into a language a new player can understand. We’re going to demystify the systems, sharpen your instincts, and forge you into a hunter capable of felling dragons with nothing but a pointy stick and your wits.
Because that’s the core philosophy of Monster Hunter Freedom Unite: this isn’t a game about lightning-fast reflexes. It’s a game of knowledge, preparation, and patience. Your brain is your sharpest weapon. Forget everything you know about modern action games. The real hunt starts now.
Read More : 10 Best PSP Easter Eggs You Definitely Missed the First Time You Played
The Hunter’s Mindset
Before you even swing a sword or craft a potion, you need to understand the fundamental principles that govern this world. Many new players bounce off MHFU, frustrated by what they perceive as “clunky” or “unresponsive” controls. This isn’t a flaw; it’s the game’s first and most important lesson. You must learn to work with the system, not against it.
1.1 This is a Turn-Based Game in Disguise
The single most important concept to grasp in MHFU is animation priority. When you press a button to attack, your hunter is locked into that animation until it completes. You cannot cancel it with a dodge. You cannot interrupt it to block. You are committed. This deliberate design choice is the heart of the game’s combat.
Think of every hunt not as a frantic brawl, but as a dance or a turn-based battle. The monster makes a move (its attack), creating a brief window of opportunity. That’s your turn. Your job is to learn the rhythm of this dance. You need to know how long a monster’s attack animation is and how long your own attack animation is to see if you have time to strike and get out safely.
This is why your first few encounters with a new monster should be spent just observing. Sheathe your weapon and just run around. Watch its movements. How does it telegraph its charge? What does it do after it breathes fire? How long does it pause after a tail spin? Avoiding damage is always more important than dealing it faster. Once you learn a monster’s patterns, you’ll know exactly when your “turn” is, and you can punish its openings with confidence.
1.2 The Camera is Your Second Enemy (And How to Tame It)
Modern games have spoiled us with sophisticated lock-on camera systems. MHFU has none of that. You are in full manual control of the camera, and it can feel like wrestling a greased pig in the middle of a dragon fight. Taming the camera is your first real hunt.
For players on PSP or Vita, there is one tip that is absolutely non-negotiable: go into the options and rebind the D-pad to function as the right analog stick. This allows you to control your hunter’s movement with the analog nub and the camera with the D-pad simultaneously, a technique affectionately known as “The Claw.” It’s uncomfortable, it’s weird, but it’s the way the game was meant to be played. If you’re using an emulator like PPSSPP, you have a massive advantage: you can map the camera controls to a modern controller’s second analog stick, making life infinitely easier.
Regardless of your control setup, your new best friend is the L button. A quick tap of the L button will instantly snap the camera to face the same direction as your hunter. This “L-tap” is your primary tool for keeping the monster in your sights. Get into the habit of constantly tapping L to re-center your view after every dodge and reposition. It will soon become second nature.
1.3 The Hunt Begins at the Farm
In MHFU, a hunt is won or lost long before you step into the snowy fields or volcanic caverns. Preparation is everything. You can have the skill of a master, but if you run out of potions, you’re going to fail. This is where Pokke Farm comes in.
The farm is your lifeline. It’s a free, renewable source of the most essential items in the game. You must make it a habit to visit and gather from every available spot after every single quest. The farm doesn’t accumulate resources over time; you have to check it regularly.
Here are your initial priorities at the farm:
- Herb and Mushroom Patches: These provide Herbs and Blue Mushrooms, the two ingredients for crafting Potions.
- Mining Spots: You’ll get essential ores for crafting early-game weapons and armor.
- Beehives: This is arguably the most important spot. It provides Honey. Combining a Potion with Honey creates a Mega Potion, which will be your primary healing item for 99% of the game. Honey is a precious commodity, so start stockpiling it immediately.
Neglecting your farm means you’ll be spending all your hard-earned zenny (the in-game currency) on basic supplies, leaving you broke when it’s time to forge that powerful new sword or armor set. A good hunter is a prepared hunter, and a prepared hunter has a well-tended farm.
Read More : 10 Best PSP Games for Short Play Sessions (Perfect for On-the-Go)
Choosing Your First Weapon
The weapon you choose will define your entire hunting experience. MHFU features a daunting array of weapon types, and the game does a poor job of explaining any of them. While every weapon is viable in the right hands, some are significantly more beginner-friendly than others. These three weapons are widely recommended not just because they are “easy,” but because each one is a masterclass in one of MHFU’s core combat pillars.
2.1 The Teacher: Sword and Shield (SnS)
“The ultimate survival tool. What it lacks in raw power, it makes up for in unparalleled versatility and safety.” The Sword and Shield is perhaps the most recommended starting weapon, and for good reason. It’s fast, it has a shield for blocking, and it possesses a unique property that makes it an incredible learning tool.
What It Teaches You:
- Resource Management & Action Economy: The SnS has a unique ability that no other weapon shares: you can use items while your weapon is unsheathed. By holding the R button to block, you can press the Square button to use your selected item. This is a game-changer. It means you can pop a Potion, eat a Steak, or throw a Flash Bomb without going through the long, vulnerable sheathing animation. This teaches you to manage your resources and take action in the heat of battle, a skill that will serve you well with every weapon.
- Defensive Versatility: With both a quick dodge and a reliable shield, the SnS forces you to learn the fundamentals of defense. Is the attack fast and weak? Dodge it. Is it a wide, sweeping attack that’s hard to evade? Block it. Mastering this decision-making process is key to surviving MHFU.
Your strategy is “stick and move.” Don’t get greedy. Rush in, deliver a few quick slashes to a monster’s legs or face, and then immediately dodge away or raise your shield. Because of its high attack speed, the SnS is also excellent for applying elemental damage or status effects (like poison or paralysis), teaching you about exploiting monster weaknesses.
2.2 The Dancer: Long Sword (LS)
“High mobility, long reach, and incredible style. The Long Sword is for hunters who want to dance just outside the monster’s reach, landing precise cuts before fading away.” The Long Sword is another fan-favorite for new players. It offers a fantastic balance of damage, range, and mobility, making it feel more fluid than many of the other “heavy” weapons.
What It Teaches You:
- Positioning and Spacing: The Long Sword’s greatest asset is its incredible reach. You can hit monsters from a surprisingly safe distance. This teaches you the critical skill of spacing. You’ll learn to stand at the perfect range where your blade can connect but the monster’s claws can’t. This mastery of positioning is the foundation of high-level play.
- Commitment & Reward: The LS is built around its unique “Spirit Gauge.” As you land hits, this gauge fills up. Once full, you can press R to unleash a powerful, multi-hit “Spirit Combo”. This mechanic is a perfect microcosm of MHFU‘s core gameplay loop. It teaches you to be aggressive to build your meter (the risk) and then to wait for a large opening—like when a monster is tripped or exhausted—to unleash your big damage combo (the reward).
Focus on using your basic poke (Triangle) and your fade slash (Triangle + Circle simultaneously) to build your Spirit Gauge while safely repositioning. Don’t get greedy and try to use the full Spirit Combo unless the monster is downed, trapped, or locked in a very long attack animation.
2.3 The Bully: Hammer
“Simple. Brutal. Effective. The Hammer is all about one thing: hitting the monster in the head until it falls over, then hitting it some more.” The Hammer might seem slow and unwieldy, but it’s one of the most powerful and effective weapons in the game, especially for learning the intricacies of monster behavior. It is, quite simply, overpowered in the right hands.
What It Teaches You:
- Exploiting Openings & Weak Points: The Hammer is slow. You cannot just run up to a monster and start swinging wildly. It forces you to learn a monster’s patterns inside and out so you can identify the openings for your devastating charge attacks and the classic “triple-pound” combo. Furthermore, the Hammer’s primary goal is always the monster’s head. This teaches you the vital importance of targeting specific weak points to maximize your damage.
- The Stun (KO) Mechanic: Hitting a monster in the head with a Hammer deals a special type of damage called “Exhaust” and “Stun.” Accumulate enough, and the monster will be knocked out, falling to the ground with stars circling its head. This creates a massive opening for you and your team to unleash hell. The Hammer is the best weapon for this, and it introduces you to a new level of combat control: creating your own openings.
Your mobility with the Hammer comes from having it sheathed. Run around the monster with your weapon away. When you see an opening, press and hold R to draw your weapon directly into a charge. Your bread-and-butter move will be the stationary “Superpound”: charge your hammer to level three, and release the R button while standing still. It’s a fast, powerful, and relatively safe attack.
2.4 Weapons to Revisit Later (And Why)
While you should eventually try every weapon , some are particularly punishing for beginners. It’s best to get a handle on the game’s fundamentals before tackling these.
- Great Sword (GS): While incredibly powerful, its charge attacks require deep monster knowledge and precise timing to land effectively. It’s a weapon you graduate to, not start with.
- Dual Blades (DS): These burn through your weapon’s Sharpness gauge at an alarming rate and require constant stamina management. To be used to their full potential, they often require a steady supply of Mega Dash Juice, a resource you won’t have in abundance early on.
- Lance & Gunlance (GL): These weapons offer incredible defensive power with their massive shields, but they severely limit your mobility. Learning to position yourself effectively with their slow walk speed and awkward hops is a challenge even for experienced players.
- Ranged Weapons (Bow, Light Bowgun, Heavy Bowgun): Starting with a ranged weapon is essentially choosing MHFU‘s “Hard Mode.” You have to craft all of your own ammo, which is a huge drain on resources and zenny. More importantly, you must craft and wear separate “Gunner” armor, which has roughly half the defense of Blademaster armor. You’ll be a true glass cannon, and a single mistake can mean instant death.
Read More : The 10 Best-Looking PSP Games That Pushed the Hardware’s Limits
The Secret Language of Armor
Here it is. The part of the game that causes more new players to quit than any monster. In MHFU, your armor is not just about defense. Your armor is your character’s build. Your power comes from the Armor Skills you activate, but the game does a spectacularly bad job of explaining how this system works. This section will unravel that mystery.
3.1 The Great Divide: Blademaster vs. Gunner Armor
First, the basics. Every armor set you can forge comes in two distinct versions: Blademaster and Gunner.
- Blademaster Armor: This is for use with all melee weapons (the 8 types we’ve discussed: SnS, DS, GS, LS, Hammer, Hunting Horn, Lance, Gunlance). It has high physical defense to help you survive in close-quarters combat.
- Gunner Armor: This is for use with all ranged weapons (Bow, Light Bowgun, Heavy Bowgun). It has significantly lower physical defense but often comes with better resistances to elemental attacks like fire or water.
The game enforces this split strictly. You cannot equip a Hammer while wearing Gunner armor. The philosophy is simple: Gunners are glass cannons who are expected to stay at a distance and avoid getting hit, while Blademasters are meant to be in the thick of the fight and need the defense to absorb blows.
There is one crucial exception to this rule: Helms and Caps. The headpiece of any armor set can be worn with either a Blademaster or Gunner set. This is your first taste of “mixed sets” and is a key technique for activating specific skills by borrowing a helm from the other armor type.
3.2 The +10 Rule: The Most Important Secret in MHFU
Pay attention, because this is the key that unlocks the entire gear system of Monster Hunter Freedom Unite. Every piece of armor you equip has points towards various skills. You can see these points on the equipment details screen. However, these points do nothing on their own. A skill ONLY activates when the total number of points for that skill, from all five of your armor pieces combined, reaches a threshold of +10.
Let’s walk through a clear example. Imagine you’re building the early-game Kut-Ku armor set:
- Kut-Ku Helm gives you +3 points in the “Attack” skill.
- Kut-Ku Mail gives you +3 points in “Attack.”
- Kut-Ku Vambraces give you +1 point in “Attack.”
- Kut-Ku Tassets give you +2 points in “Attack.”
- Kut-Ku Greaves give you +1 point in “Attack.”
Your total is 3+3+1+2+1=10. As soon as you equip that final piece and hit +10, you’ll see a message on your screen, and if you check your status, the skill “Attack Up (Small)” will be active. If you had only +9 points, you would get absolutely no bonus.
This works for negative skills, too. If your armor pieces combine to give you -10 points in a skill, you will activate a penalty, like “Attack Down (Small)”. Many powerful armor pieces come with negative skill points to balance them out.
Some skills have higher tiers that activate at +15 and +20 points, offering even greater benefits (e.g., Attack Up (Medium) at +15, Attack Up (Large) at +20).
So, how do you customize this? With Decorations. At the smithy, you can craft jewels that grant skill points (e.g., an Attack Jewel might give +1 to Attack). These jewels can be slotted into empty slots on your weapons and armor to help you reach that magic +10 threshold. This is the heart of creating custom “mixed sets” later in the game.
3.3 Decoding Your Weapon: Raw, Element, and the Almighty Sharpness
Now that you understand skills, let’s look at what makes a weapon good. Every weapon has a few key stats, but three matter most: Raw Damage, Elemental Damage, and Sharpness.
Raw vs. Elemental Damage
- Raw Damage: This is the base physical power of your weapon. It’s the big number you see at the top. Raw damage is reliable and works on every monster.
- Elemental Damage: Many weapons also have an elemental value, like Fire, Water, Thunder, Ice, or Dragon. This is extra damage that gets added on top of your raw damage only if the monster is weak to that element. Hitting a Rathalos (which is weak to Dragon) with a Dragon-element weapon will do significant bonus damage. Hitting it with a Fire weapon (which it resists) will do almost no elemental damage.
So which is better? Here is the golden rule of the Old World:
- Fast-hitting weapons love Elements. Weapons like Sword and Shield, Dual Blades, and Lance hit many times in a short period. Since elemental damage is a flat amount added to every single hit, more hits mean more total elemental damage.
- Slow-hitting weapons love Raw. Weapons like Great Sword and Hammer rely on a few, massive hits. The damage formula for these big attacks heavily multiplies the weapon’s Raw value, making high raw the top priority. Elemental damage is just a nice little bonus.
The King of All Stats On your weapon’s info screen, you’ll see a colored bar. This is your Sharpness gauge. As you hit a monster, this gauge depletes, and the color changes. You use a Whetstone to restore it. A common beginner mistake is to think Sharpness is just about preventing your weapon from bouncing off a monster’s tough hide. The truth is far more important.
Sharpness is a massive, hidden damage multiplier. It affects both your Raw and Elemental damage. Maintaining a high level of sharpness is the single most important thing you can do to increase your damage output during a hunt.
This is not an exaggeration. Look at the numbers. The table below shows the damage multipliers for each sharpness level in MHFU. This is the secret knowledge that separates the greenhorns from the veterans.
| Sharpness Color | Raw Damage Multiplier | Elemental Damage Multiplier | What it Means for You |
| Purple | 1.45x | 1.20x | The absolute peak of damage. The goal of all G-Rank sets. |
| White | 1.32x | 1.125x | A massive damage boost. Your target for High Rank. |
| Blue | 1.20x | 1.0625x | A very significant 20% raw damage boost. The standard for late Low Rank. |
| Green | 1.05x | 1.00x | A tiny boost. This is your baseline for early Low Rank. You should aim to get past this ASAP. |
| Yellow | 1.00x | 0.75x | You are doing baseline raw damage and losing 25% of your elemental damage. Sharpen immediately. |
| Orange | 0.75x | 0.50x | You are losing 25% of your raw damage and will bounce on almost everything. Stop fighting and sharpen. |
| Red | 0.50x | 0.25x | You are doing half damage. You are actively hurting your team. Sharpen now. |
Understanding this table re-contextualizes the entire game. Suddenly, you understand why a weapon with slightly lower raw but a longer bar of blue sharpness might be better than one with high raw but only a sliver of green. You understand why skills like Sharpness +1 (which can unlock the next color tier on the bar) and Razor Sharp (which halves the rate of sharpness loss) are considered the most powerful and sought-after skills in the entire game for Blademasters. Always keep your weapon sharp.
Read More : The Price of Freedom: A Story of Zack Fair’s Enduring Legacy in Crisis Core..
Your Low-Rank Roadmap
You have the knowledge. Now you need a plan. This section provides a simple, step-by-step progression path for your weapons and armor that will carry you through all of Low Rank (the quests given by the Village Elder and the 3-star to 5-star quests in the Gathering Hall).
4.1 Forging Your First Real Weapon
The default Bone and Iron weapons the game gives you are trash. Your first priority should be to upgrade to something with decent Green sharpness. Let’s use the beginner-friendly Long Sword as our example path.
- Step 1: Start by forging the basic Iron Katana.
- Step 2: Gather some more ore and upgrade it to the Iron Katana “Grace”.
- Step 3: This is your first major weapon goal. As soon as you can, farm the materials to forge the Eager Cleaver. This is a fantastic early-game Long Sword that you get by upgrading the Iron path. It has a healthy amount of Green sharpness and solid raw damage that will be more than enough to carry you through the first few tiers of Village quests.
No matter which of the “beginner trio” weapons you choose, look for a similar path. Your goal is to get a weapon with a long bar of Green sharpness as quickly as possible.
4.2 Your Armor Progression: A Step-by-Step Guide
Your armor journey in Low Rank is a hidden tutorial for the game’s core systems. Each new set you build will teach you a valuable lesson.
Step 1: The “Get Me Out of This Leather” Set (Hunter Rank 1 / Village 1★)
- Armor: Full Battle Armor set.
- Why: You can buy the pieces for this set from the armor vendor very early on. It has much better defense than the default Leather armor and, more importantly, it serves as your first lesson in armor skills. The full set gives you +8 points in PsychicVision and points in Attack and Sharpening. It won’t activate any skills on its own, but it teaches you to look at the skill point page and start thinking about how to reach the +10 threshold with decorations.
Step 2: Your First Trophy Set (Village 2★ – 3★)
- Armor: Full Yian Kut-Ku set.
- Why: This is your first real farming goal. Yian Kut-Ku is one of the first large monsters you’ll fight, and hunting it repeatedly to craft its full armor set is a core part of the Monster Hunter experience. Your reward is a tangible power boost: the full set gives you the Attack Up (Small) skill right out of the box, no decorations needed. This is the moment you’ll realize the power of targeted farming.
Step 3: The Low-Rank “Meta” (Village 4★ – 5★ / HR 2-3)
- Armor: You now have a choice between two of the best Low-Rank sets in the game. The one you choose depends on your preferred playstyle.
- Path of the Blade (Offensive Choice): Full Shogun Ceanataur Armor.
- Why: Now that you understand the supreme importance of Sharpness, you’ll understand why this set is legendary. The full Ceanataur set gives you the skills Razor Sharp (your sharpness depletes at half the normal rate) and Speed Sharpening (you use a Whetstone much faster). This is a massive offensive and quality-of-life upgrade. You’ll spend more time attacking and less time sharpening, drastically increasing your damage output. This set is so good it can easily carry you all the way to High Rank.
- Path of the Hunter (Utility Choice): Full Yian Garuga Armor (with the Garuga Mask headpiece).
- Why: The Yian Garuga is a tougher monster to farm, but the reward is one of the most comfortable and powerful utility sets in Low Rank. This combination gives you Reckless Abandon +1 (a 10% boost to your Affinity, or critical hit chance) and, most importantly, Earplugs. Earplugs make you immune to the roars of many monsters. When a monster roars, other hunters will be stuck covering their ears for several seconds, but you’ll be free to attack. This skill teaches you the immense value of creating your own openings through utility rather than just raw power.
The True Hunt Begins Now
You’ve made it, hunter. You’ve survived the crash course. You understand the dance of combat, the secret language of skills, and the path to power. You are no longer a greenhorn fumbling in the dark. You have the knowledge, you have the tools, and you have the mindset.
But this is just the beginning. Monster Hunter Freedom Unite is a game about mastery, not just completion. Every monster is a new puzzle, every weapon a new discipline to master. You will fail. You will cart. You will curse at a Plesioth’s hip-check from across the map. But every failure is a lesson. Learn from it, go back to the smithy, prepare better, and try again. That is the loop. That is the hunt.
The Pokke Village Elder has more quests waiting. The Guild is always looking for promising new talent. You have everything you need to succeed. Go make your own legend, Hunter. Welcome to the Guild. Discover fascinating game insights in Revan’s latest articles! Stay updated daily by Following Geminvo on Instagram, X (Twitter), Facebook, YouTube & TikTok.
Summary The Ultimate Beginner’s Guide to Weapons and Armor in MHFU
- Core Philosophy: Monster Hunter Freedom Unite (MHFU) is a game of preparation, knowledge, and patience, not just reflexes. Combat is methodical, like a turn-based game, where you must learn monster patterns to find openings.
- Beginner Weapon Recommendations:
- Sword and Shield (SnS): Teaches resource management and defense with its ability to use items while unsheathed and its shield.
- Long Sword (LS): Teaches positioning and spacing with its long reach and the risk/reward of its Spirit Gauge.
- Hammer: Teaches how to exploit weak points (the head) and create openings through the Stun (KO) mechanic.
- The Armor Skill System Explained: Skills only activate when the total skill points from all armor pieces and decorations reach a threshold of +10. Anything less than +10 provides no benefit.
- The Importance of Sharpness: A weapon’s sharpness level is a critical damage multiplier. Higher sharpness (Blue, White, Purple) provides a massive damage boost, while low sharpness (Yellow, Orange, Red) severely penalizes your damage. Keeping your weapon sharp is paramount.
- Raw vs. Elemental Damage:
- Raw Damage: Best for slow, heavy-hitting weapons like the Great Sword and Hammer.
- Elemental Damage: Best for fast-hitting weapons like the Sword and Shield and Dual Blades, as the damage is applied on every hit.
- Low-Rank Armor Progression:
- Battle Armor: A basic starting set to learn about skill points.
- Yian Kut-Ku Armor: Your first farming goal, providing a free
Attack Up (Small)skill. - Shogun Ceanataur Armor: The best offensive set for Low Rank, providing key sharpness-related skills.
- Yian Garuga Armor: An excellent utility alternative, providing
Earplugsto ignore monster roars.